Sunday, May 16, 2010

Очень красивый фартук

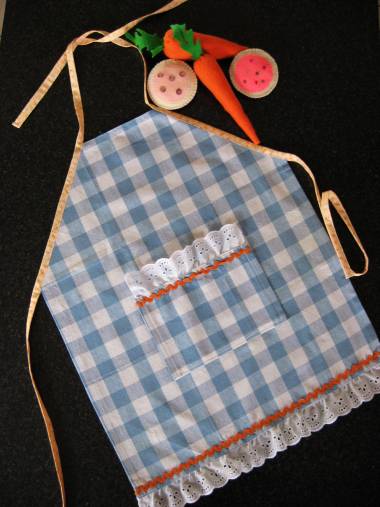
Child’s Apron Tutorial


Apron Template Download


  • Download the template and cut two pieces, one for the front and one for the back.

  • Cut 1 strip of fabric 4 inches by 45" (ruffle)

  • Cut 1 strip of fabric 5 inches by 25" (waistband) Finished size is 20 -23 inches. Take your child's waist measurement and add about 5 inches to determine the length of fabric needed.


childapron1

Press ruffle piece (4 " X 45" long strip) in half lengthwise

childapron2

To finish the ends of the ruffle, take the end and fold right sides together then stitch across the end about 1/4" from the edge. Repeat for other end.

childapron3

Turn right side out.

childapron4

Gather the ruffle piece.  I do this by zig zag stitching over a piece of dental floss, making sure to not stitch into the dental floss.

childapron5

Fold piece in half to find the middle and pin.

childapron6

Gather evenly.

childapron7

Matching center of ruffle with center of apron, pin ruffle to right side of apron.

childapron8

Notice how I placed edge of ruffle hanging off the edge of the apron. To make the ruffle taper into the apron, bring the finished end point of the ruffle over to the marking line on the pattern. You may also choose instead to make it go straight by lining up the unfinished edge all the way up the side, just stop at the line (see template).

childapron9

Place other apron piece on top, pin and then stitch all the way around 1/2 inch from the edge. It worked for me to hold the fabric from the front and back and slightly pull while sewing to keep the top and bottom layers flat. I have a setting that allows the needle to remain in the fabric when I stop-- this helps me also.

childapron10

Turn right side out and

childapron11

top stitch all the way around sides along the ruffle. You do not need to stitch across the top.

childapron12

For waistband. Press 5" X 25" inch piece in half lengthwise.  Open up and press each edge to center, then fold in half and press(for a visual on this technique look here on how tote bag strap is pressed). Finish each end the same way as the ruffle ends. Pin to top of apron.

childapron13

Top stitch all the way around the edge.  Sew a two inch piece of Velcro to the back of the front of the apron and a three inch piece to the end of the strap. This allows the waist to be adjustable.

childapron14

I added a flower to the front of the apron where the Velcro was sewn. You can learn how to make the fabric flower from Wisecraft.

childapron151

Not only does she look fancy while she is cooking, she can put it on and take it off all by herself!

childapron16


http://www.skiptomylou.org/

Идеия фартучка для девочки


gracies-apron.jpg

bellas-apron.jpg

Как сшить простой и красивый фартук

A Tea Towel Apron is one of the quickest and simplest aprons to make!


Grab a tea towel and a half yard (or at least 16")  X 45" wide matching fabric and you are ready to make a great gift!

I wanted to make cute holiday aprons and found these tea towels from the Martha Stewart collection at Macy's.

tea towel apron 1

Making the waistband/sash


Cut the half yard or 16" of fabric in half lengthwise, so you have two long pieces at least 8" wide.

tea towel apron 2

Using about 1/4" to 1/2" seam, sew right sides together at one end.

tea towel apron 3

Press entire length of fabric in half lengthwise, wrong sides together.

tea towel apron 4

Open fabric up and press each edge to the middle. Yes, it is a long piece of fabric but the pressing  is the hardest part and this makes such a nice looking waistband!

tea towel apron 5

Fold in half and press again.

tea towel apron 6

To finish each end, fold the fabric in half the other way and stitch 1/4" from the edge. Repeat on other end.

tea towel apron 7

Turn right side out, make sure corners are pointed and press.

tea towel apron 8

Attaching the apron to the waistband/sash


Cut tea towel in half, or if you want it a bit longer, adjust accordingly.  Place left edge of towel even with the seam and insert the  cut edge of tea towel inside the long strip of waistband fabric (make sure the tea towel goes clear up to the fold). Pin.

tea towel apron 9

Start at the end of the sash and edge stitch all the way around, stitching the open side (making sure edges meet)  first, then around to the top edge until you are back to where you started.

tea towel apron 11

Finished!


The apron ties on the side with a bow.  The ties are long enough that the apron will fit most everyone!

tea towel apron 10

Wrapping


There is half (or a little less if you made apron longer) of an apron.  This fabric could easily be used to make pockets, ruffles (or something I will show you later in the week) but this time I made matching fabric gift bags for the aprons!

tea towel apron 12

Are you making something crafty for the holidays? Skip on over toToday's Creative Blog and link up your project. You will love all the creative ideas you will find.